
Installation and Configuration
Anything with a green outline around it is a required setting. Anything orange is required but depends on your drive.
Download and Install EAC
This guide was made for EAC version 1.8, and here is the official download link.
You can see this window before installing, Make sure you install MusicBrainz Metadata Plugin, CDRDAO, FLAC, AccurateRip, CTDB Plugin and AcoustID Plugin as a bare minimum.
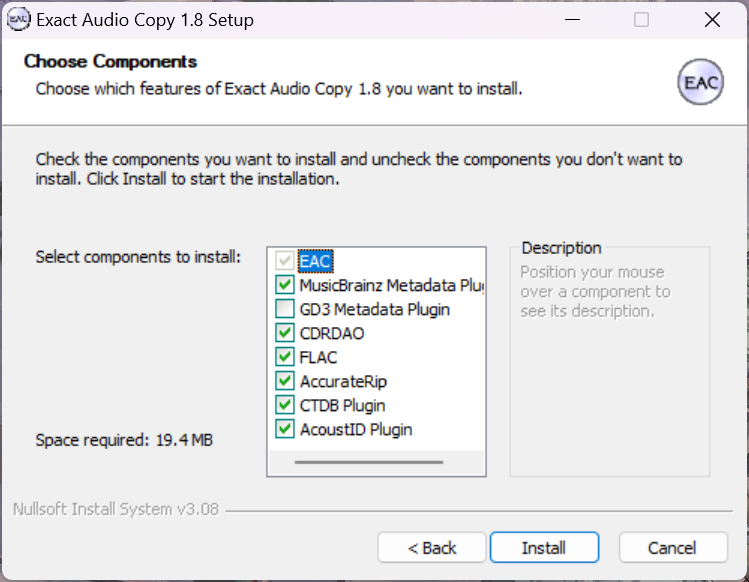
FLAC will be useful as well if you don’t have it separately installed. GD3 is only useful if you want to pay for metadata results. I assume you don’t.
ATTENTION: This version of EAC doesn’t combine with the latest FLAC. You may download the latest version of FLAC on GitHub, then copy and paste it to the Exact Audio Copy\Flac path. As of May 2026, the latest version is 1.5.0.
Set Offset
The “read sample offset correction value” will be simply called “offset” in this article.
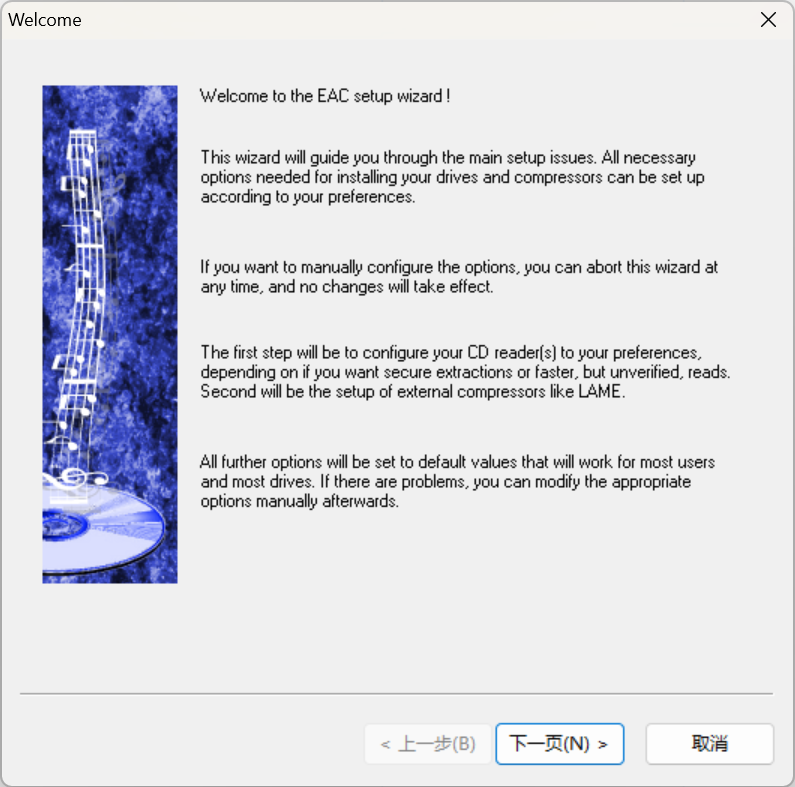
When you first start EAC, you’ll see a screen like this one. Hit “Cancel”.
Next, put a popular retail CD into your drive, there will be two situations.
Your Drive Has Been Recorded at AccurateRip
You’ll see this window.
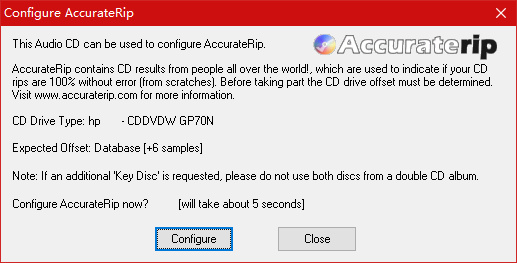
Hit “Configure”. It may take about one minute. Then you will see this:
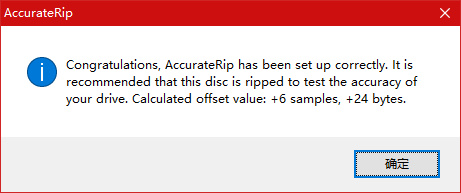
Hit “OK”. If you have an older version of EAC or dBpoweramp installed, it’s likely AccurateRip was already configured, and this may not appear. You may need to try multiple CDs to get this to show up.
Your Drive Has NOT Been Recorded at AccurateRip
CLICK HERE TO READ THIS PART
The CDs mentioned below should all be popular retail ones, they are called “Key Discs” by EAC.
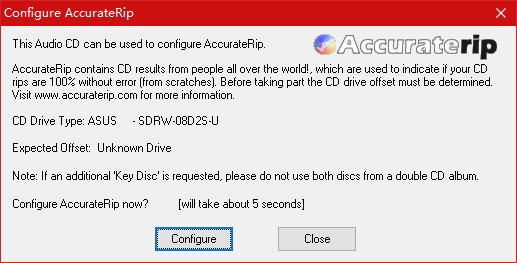
After putting a CD, EAC will show you a window (if not, change another CD, until the window popped up), which reads:
Hit “Configure”.
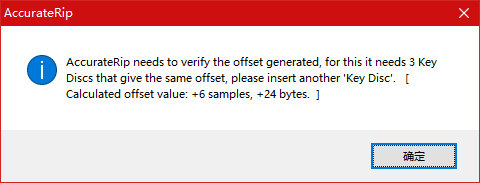
OK, change another CD (still, change CDs if nothing happened), now it shows like this:
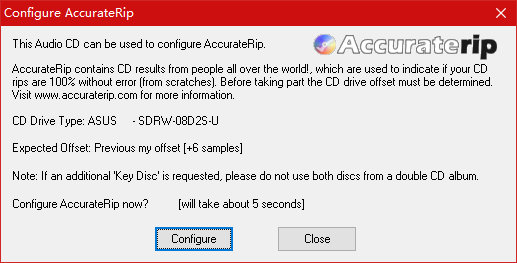
Hit “Configure” again, and you’ll see:
EAC needs 3 Key Discs to confirm the offset in all. We’ve put two, and got the same result. If the third one gives the same offset, we will finish this step.
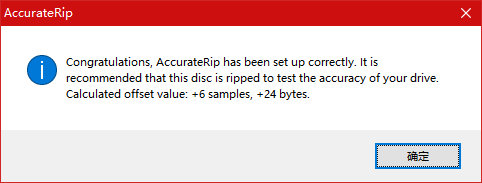
Hit “Configure”.
This means you are done. Good job!


Download and Load the Profile
Download the Profile file.
Then “Load Profile…”:
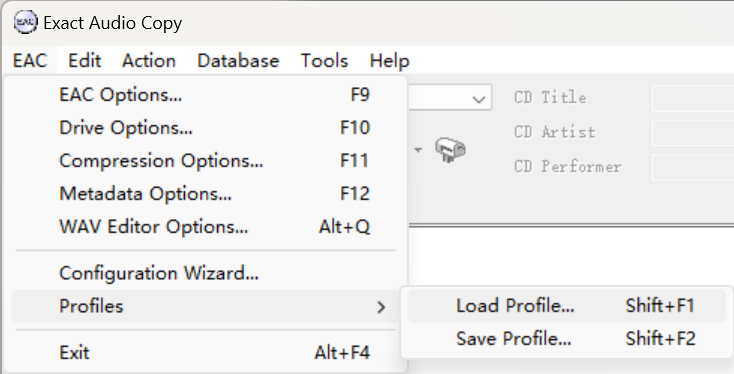
Find the EACProfile.cfg file you just downloaded and open it. Most settings will be configured correctly.
External Compression
Set “Program, including path, used for compression” to the flac.exe file in the Flac folder of EAC directory.
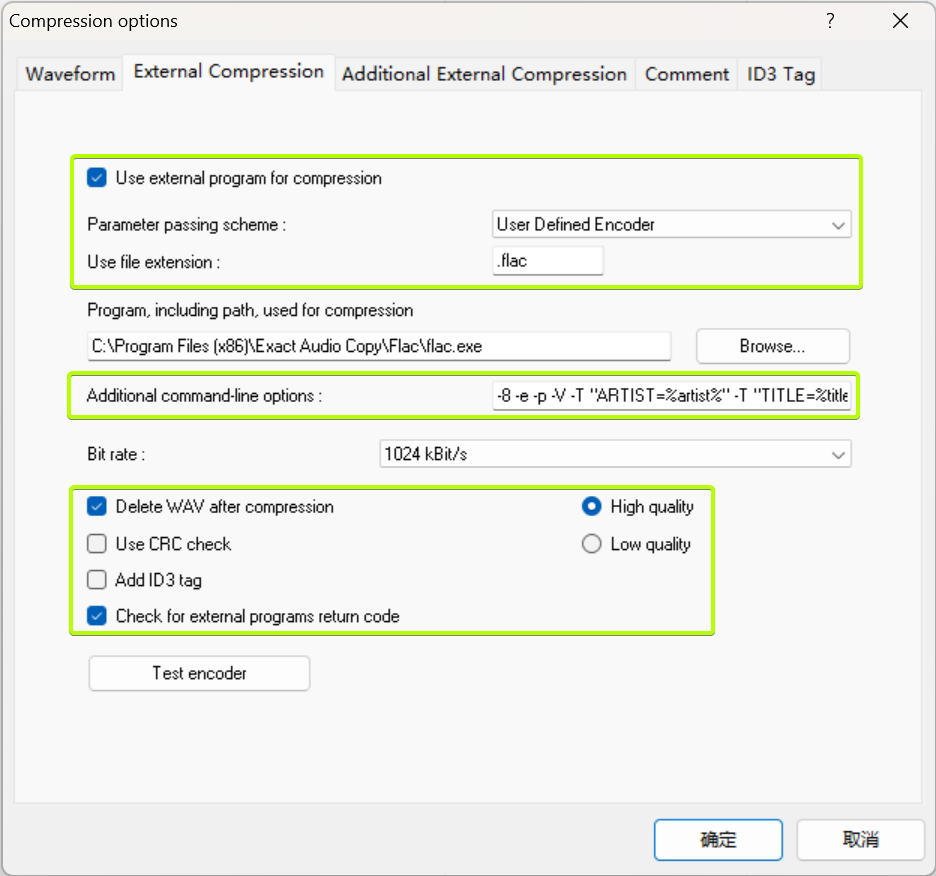
Please notice that FLAC 1.5.0 supports multi-thread compression. You may edit “Additional command-line options” to speed up. You just easily use -8 -j 8 to replace -8 in the command-line, then you can use 8 threads compression. The number behind -j is the thread number you use. After my test, 16 threads can provide 10× compression speed. There is no benefit to using more than 16 threads.
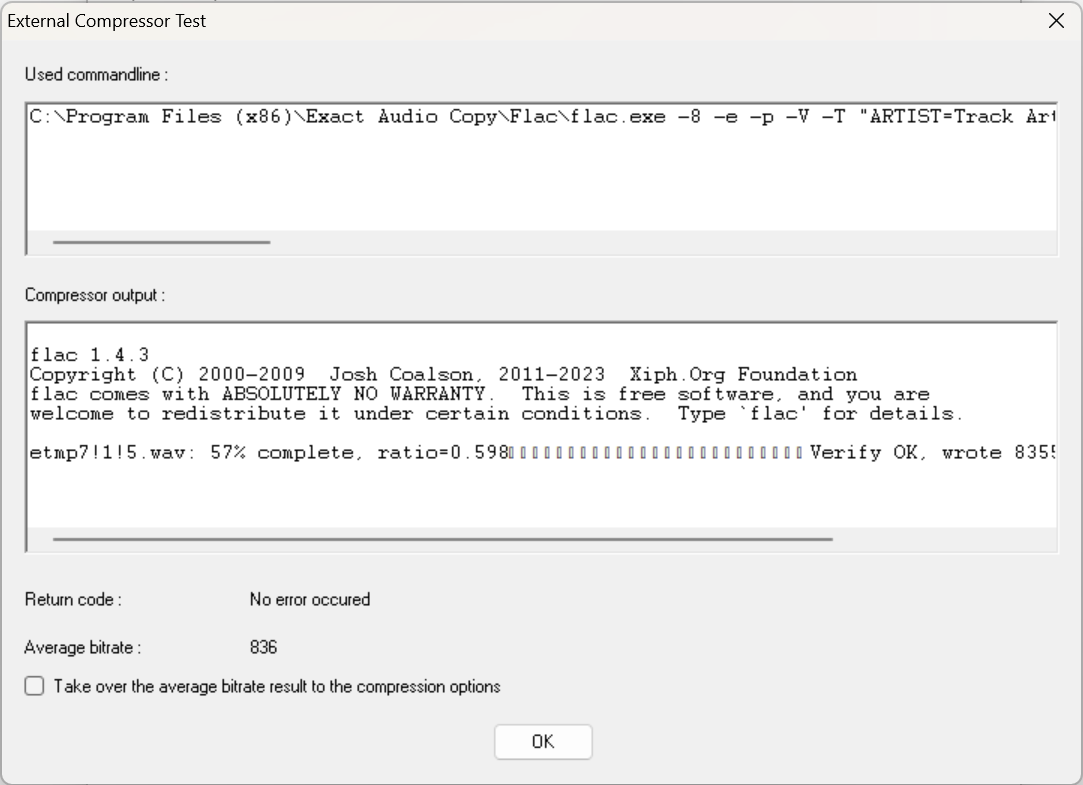
After editing, tap “Test encoder”, and make sure “No error occurred”:
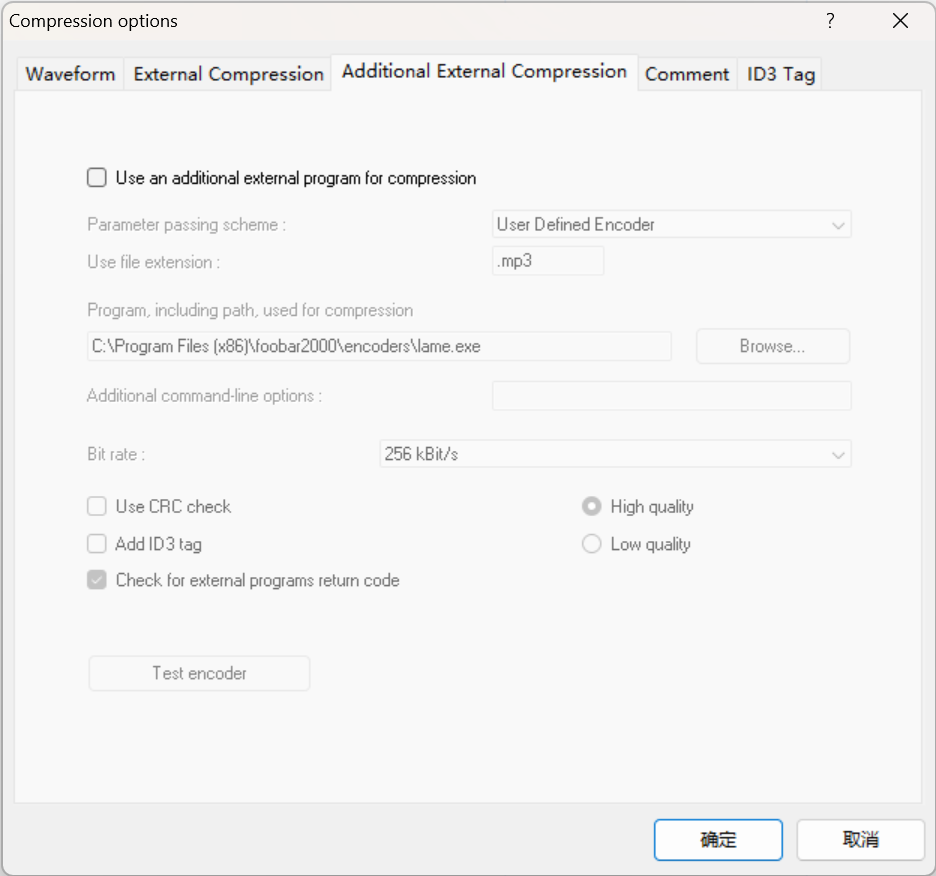
Additional External Compression (optional)
If you want to rip another format at the same time, you may check “Use an additional external program for compression”, and configure and test it like the “External Compression”:
EAC Options
Directories
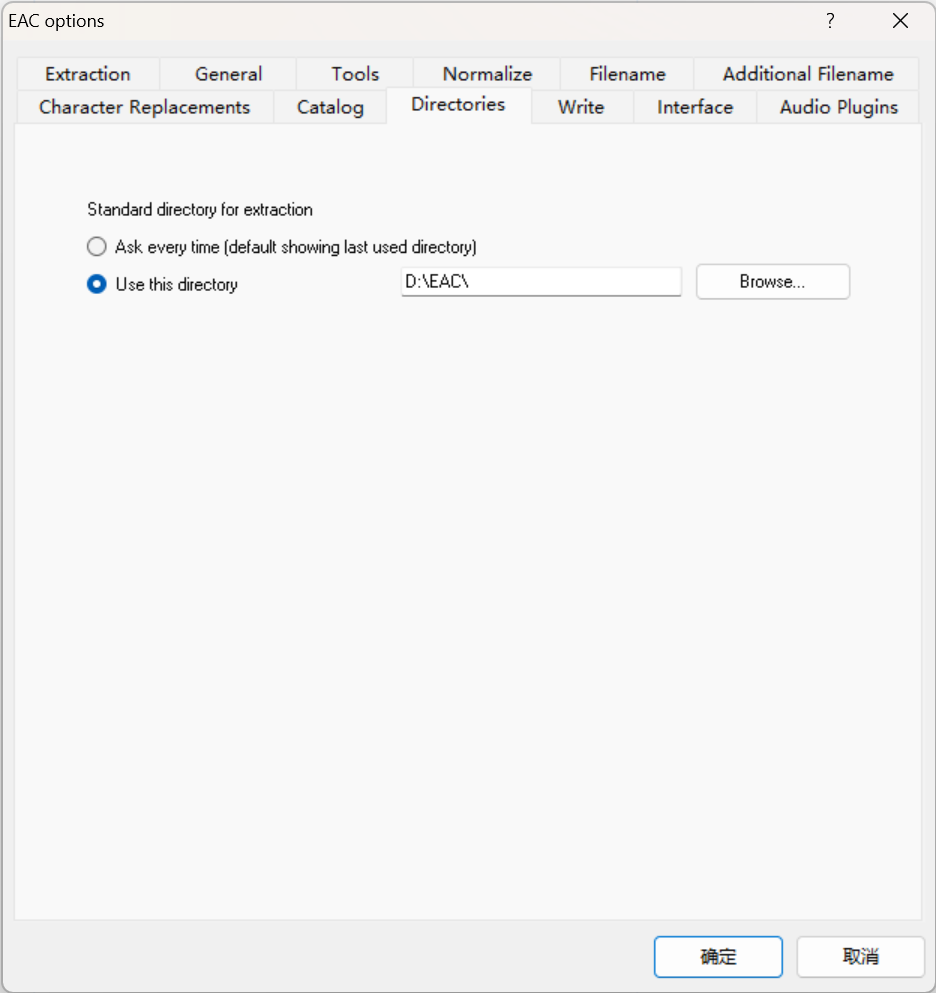
“Use this directory” is a good choice, which can put all rips in the same main folder. Of course, you may have another design, just edit it here.
Drive Options
Extraction Method
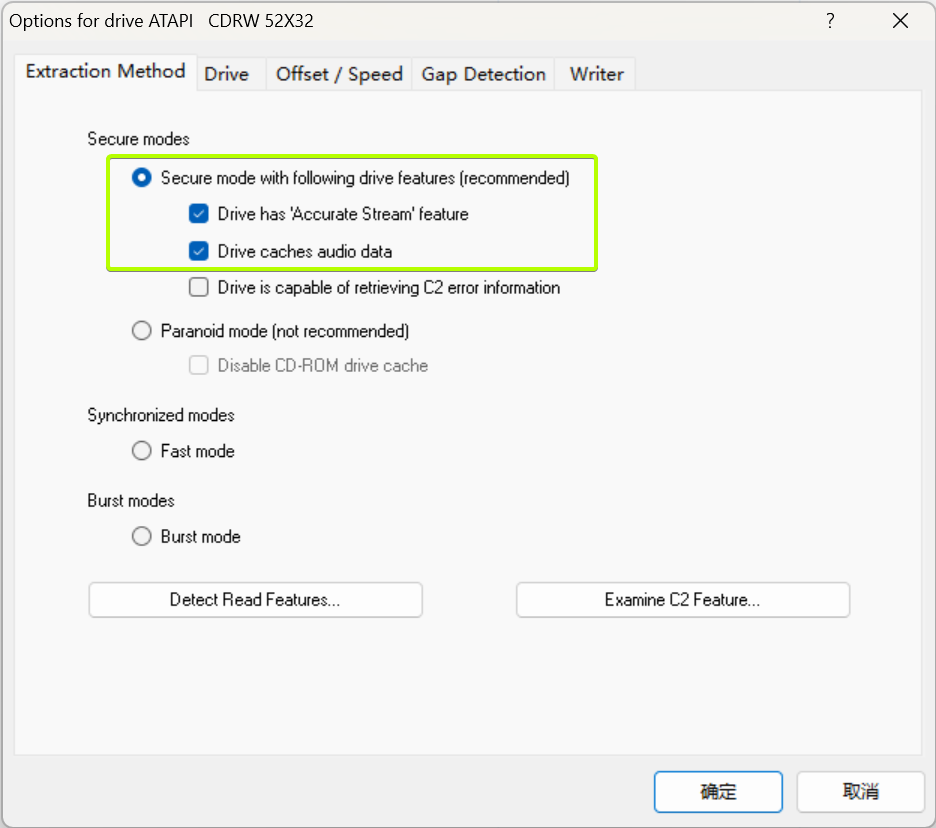
Check like the screenshot.
Drive
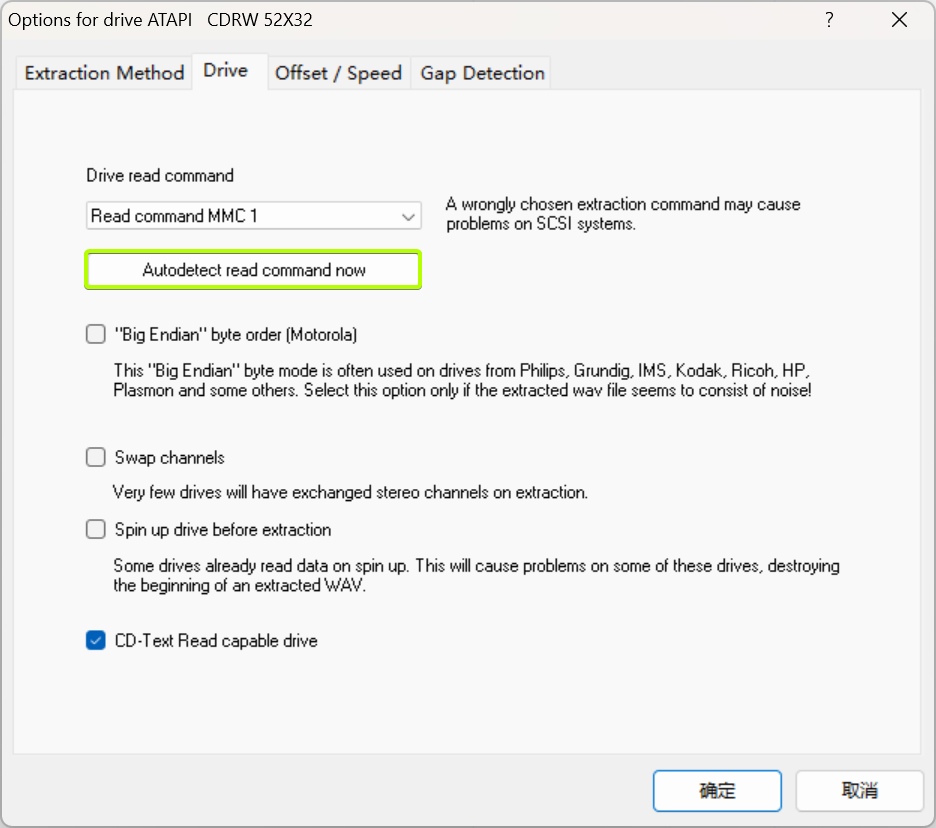
Hit “Auto detect read command now”.
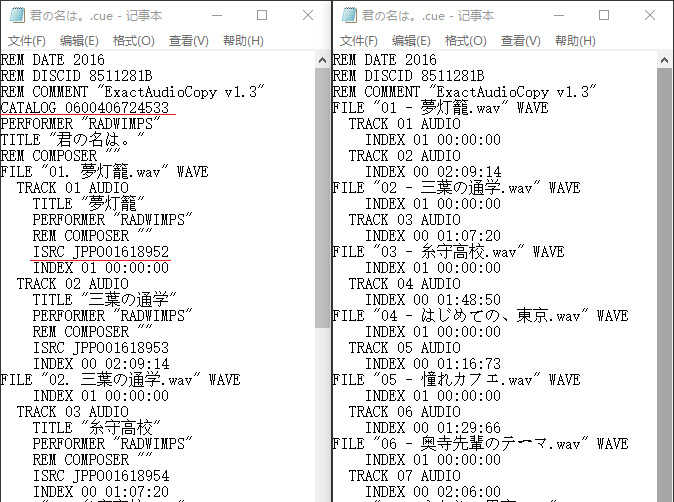
Check “CD-Text Read capable drive” if your drive supports this function. Which can bring you some extra information in your cue file:
If your drive is slow, you may try to check “Spin up drive before extraction”, that MAY make the ripping process faster. If your drive is purchased recently, you may not need to check this option.
Offset / Speed
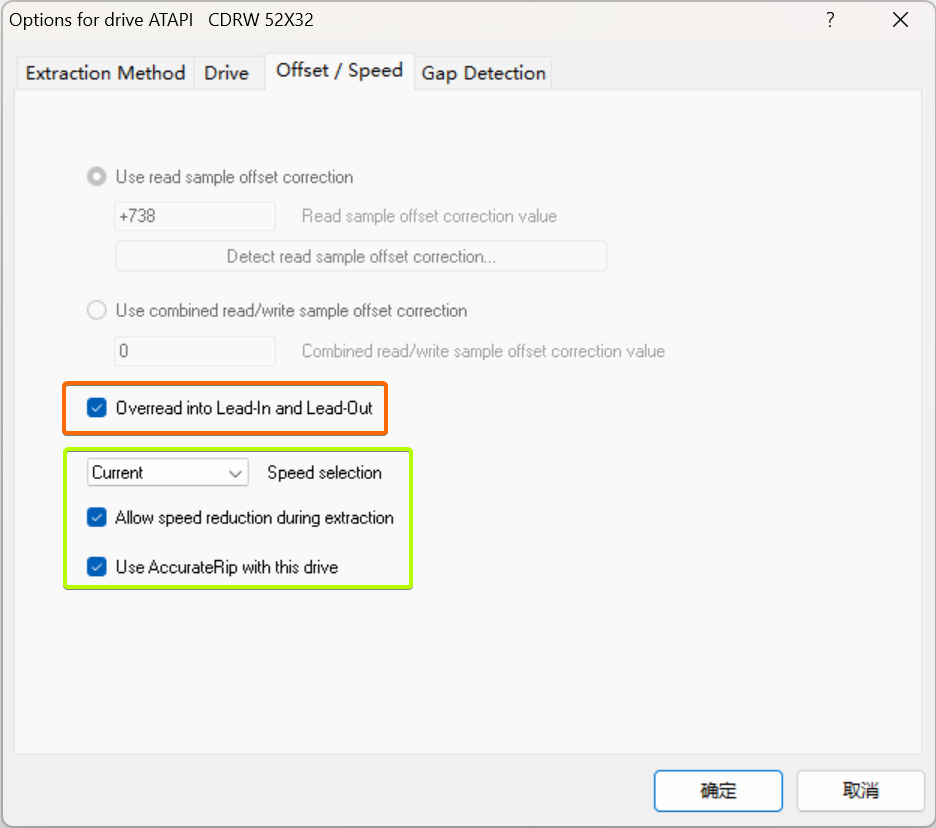
If you did the AccurateRip configuration at the start of this guide, the top half here will be greyed out. AccurateRip is a very useful function for checking that your rips are OK, so you will need to go back and get it configured if this option isn’t greyed out.
Gap Detection
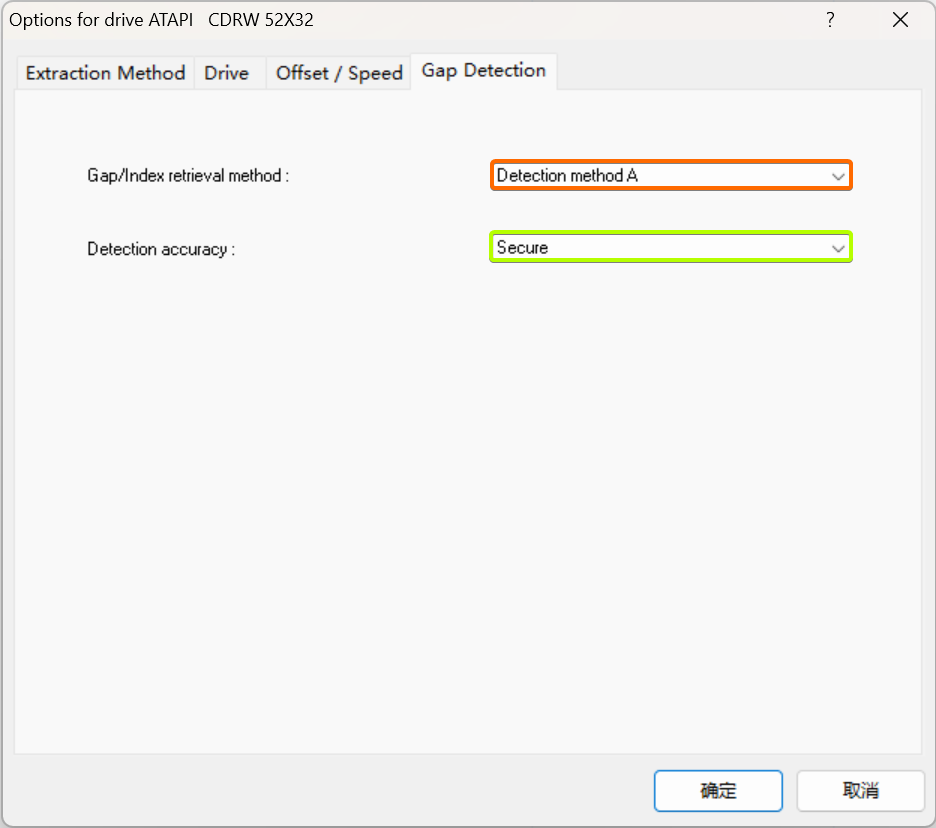
Pretty much every drive should work with the settings shown. If yours stalls on detecting gaps or detects gaps that are obviously wrong (like 30-second gaps on a non-live album), try Detection method B or C. If A, B, and C are all fail, you can switch “Secure” to “Accurate” and try again.
Ripping
EAC is now properly set up! You may start from here next time.
Tagging
EAC has several metadata providers:
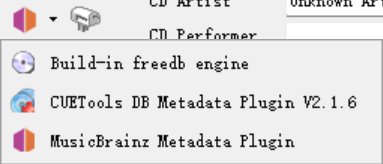
MusicBrainz and CTDB are both useful. Besides, Gracenote is also a good choice. You may want to try it if MusicBrainz and CTDB don’t work.
How to Configure Gracenote and Import Its Data
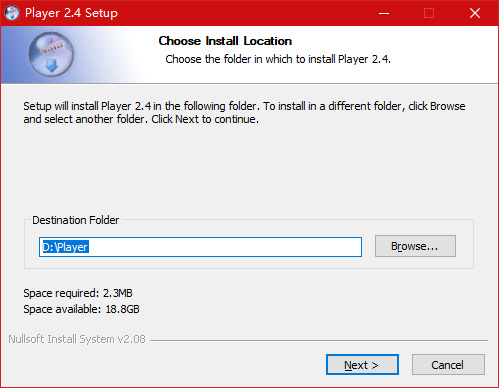
Firstly, go to the official site to download and install the software called “Player”.
After installation, run it as an Administrator.
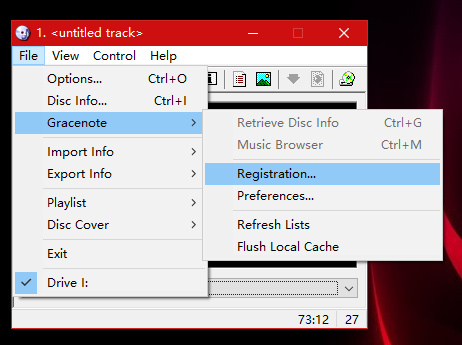
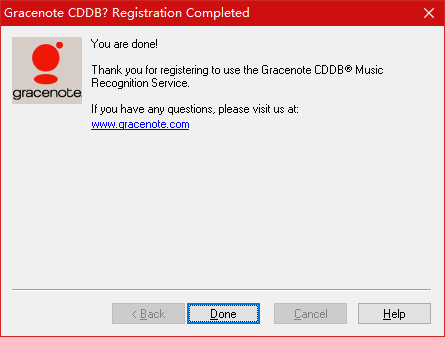
Register Gracenote.
Just hit “Next” and “Agree”.
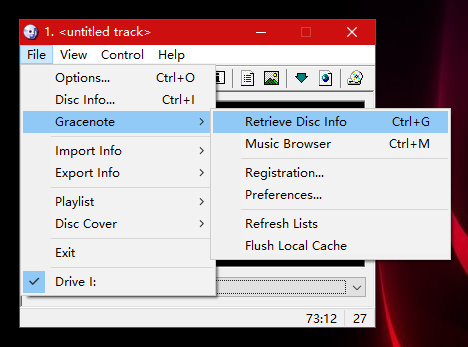
Then you may use “Retrieve Disc Info” to fetch CD info.
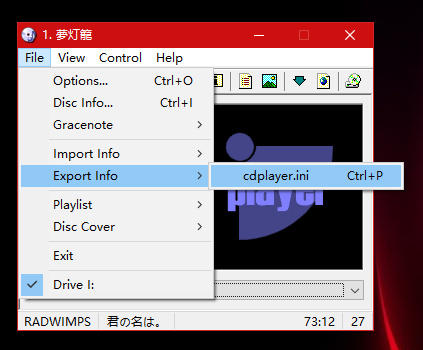
Then export CD info.
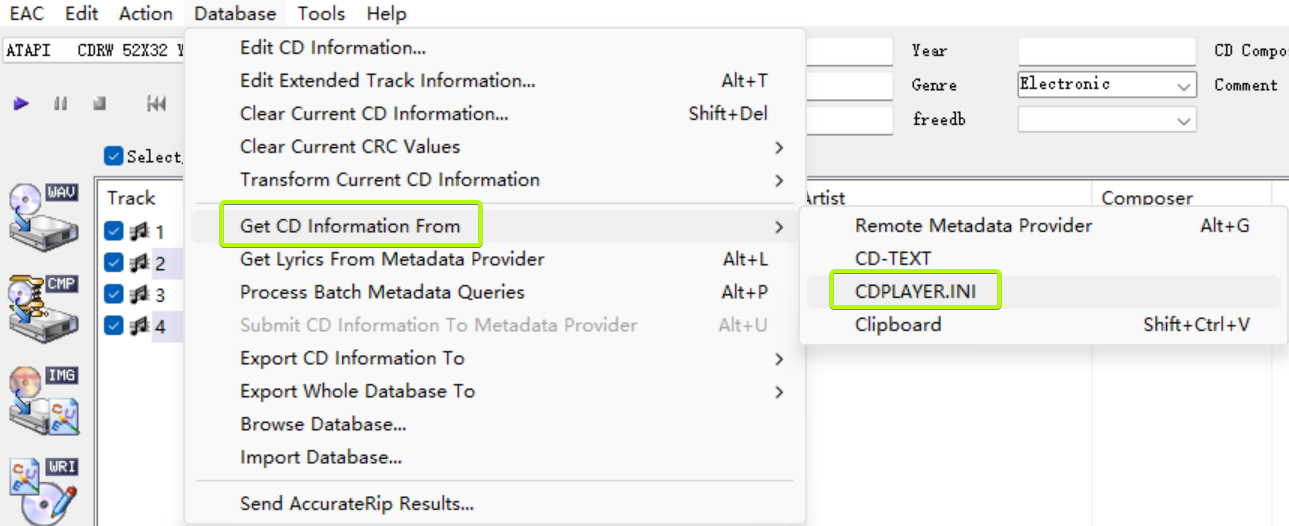
It seems nothing happened after exporting, but the information has been exported successfully. Then open EAC, “Get CD Information From”
CDPLAYER.INIto import the info:
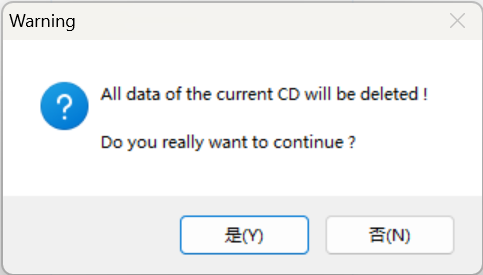
There will be a warning:
Only metadata will be wiped. The data on the CD will be safe, don’t worry. Just “Yes”.
Gracenote doesn’t provide the release year, you need to search and fill in. Some characters are not supported by Gracenote, they would be replaced by
?, take care of this please.If the import fails (sometimes because the CD has data tracks), you may copy and paste manually. You can find a
cdplayer.inifile in theC:\Windowsdirectory. Open it with Notepad. The info stored incdplayer.iniwill be like:
 1
 2
 3
 4
 5
 6
 7
 8
 9
10
11
12
13
[43CCB1] EntryType=1 artist=欅坂46 title=世界には愛しかない numtracks=6 0=世界には愛しかない 1=ボブディランは返さない 2=ひらがなけやき 3=世界には愛しかない -off vocal ver.- 4=ボブディランは返さない -off vocal ver.- 5=ひらがなけやき -off vocal ver.- order=0 1 2 3 4 5 numplay=6
0=follows the track title of the first track and so on.
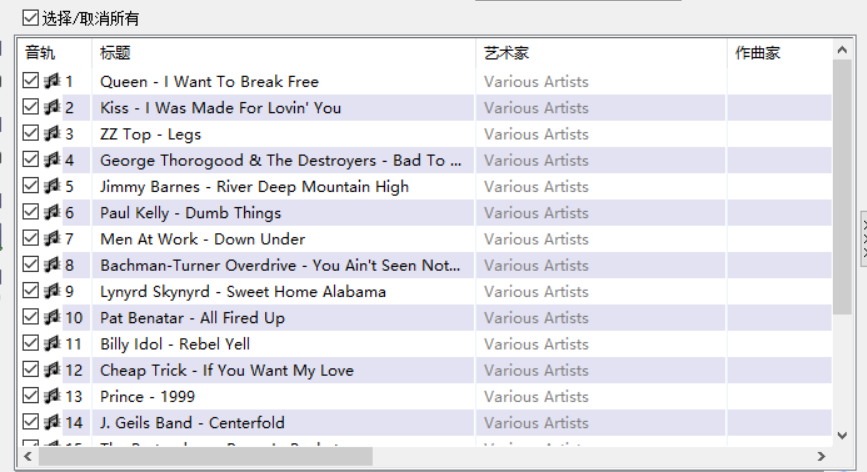
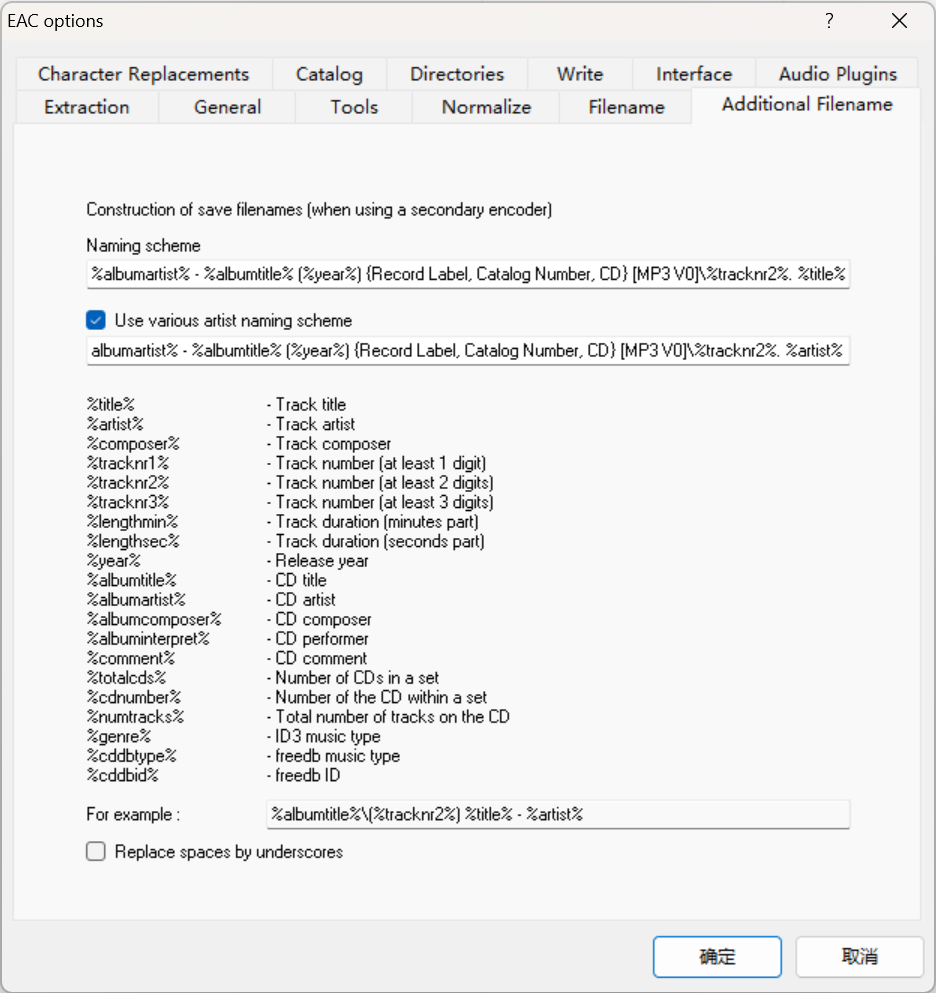
Sometimes, Gracenote will put artist names in the “Track Title” field, which typically happens on multi-artist albums. I suggest you split artist names into the “Artist” field.
The Situation Where Artist Names and Track Titles Are Stacked Together
If you meet this:
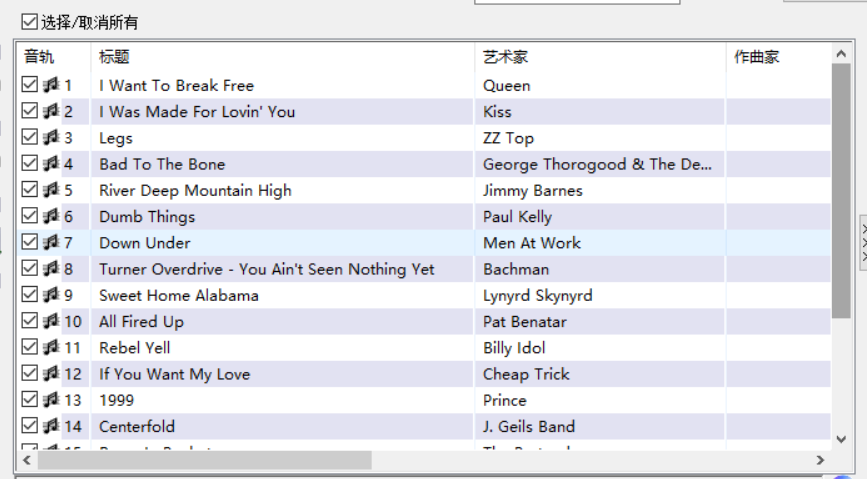
Hit “Database” → “Transform Current CD Information” → “Split Track Information To Artist/Title”, then check if the info was splitted correctly. If EAC put artists and track titles in the opposite position:
You need to hit “Database” → “Transform Current CD Information” → “Exchange Artist <-> Title”:
This is the easy way to split artists and track titles.

It’s very necessary to fill the “CD Performer” for the multi-artist album. If not, music players may recognize the tracks belong to different albums (same title but different artists). You may fill in Various Artists or other suitable content, to make the whole album unique.
Correctly Set the Folder Name for Your Rip
Please read this section carefully and follow the instructions to avoid mistakes!
Please read this section carefully and follow the instructions to avoid mistakes!
Please read this section carefully and follow the instructions to avoid mistakes!
Open “EAC” → “EAC Options…” → “Filename”, and you should see this window:
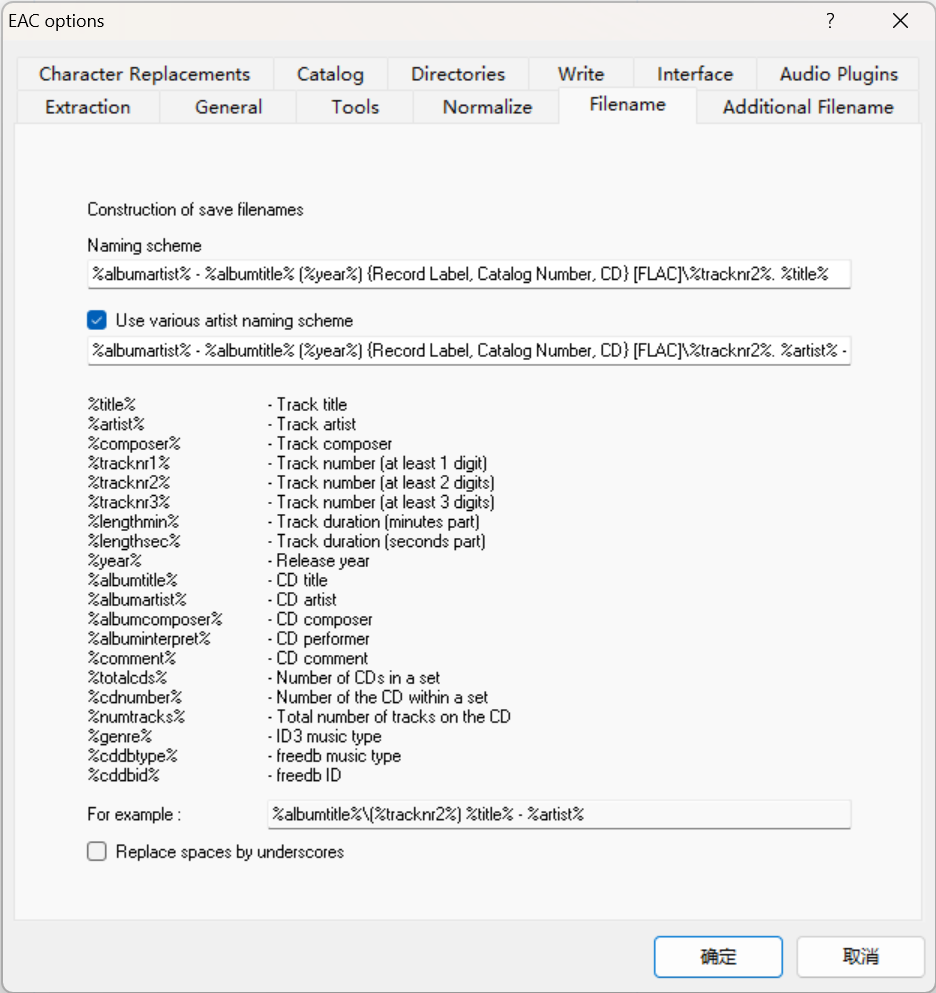
The “Naming scheme” is already filled by:
|
|
It provides a very detailed naming format.
If you know nothing about Record Label and Catalog Number, or your album doesn’t have this information, you may delete the whole part in the {}, like:
|
|
But, if you collect different media, versions, or formats of a specific album, the detailed naming format can help you find the folder you want easily. If you keep “Record Lable” and “Catalog Number”, you have to fill them every time MANUALLY according to the physical media. They are not variable. For example:
You need to edit it like this according to its obi:
|
|
Correctly filling this part can help people recognize different releases and make you look professional. This info would be written in the log file, even if the folder name was edited. The LOG file keeps the original data.
Of course, some albums don’t provide this info, it’s OK to ignore if the album doesn’t have.
After checking “Use various artist naming scheme”, the naming format setting here will be activated if trackers have different artists. Whether check this option or not is totally up to you.
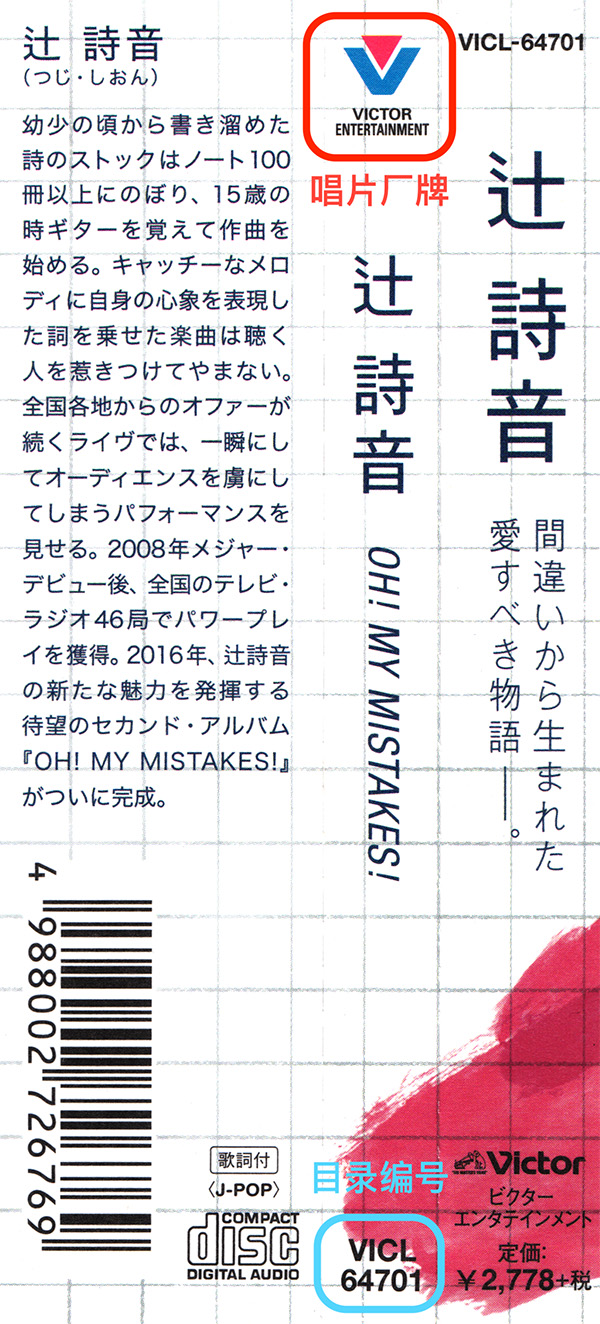
Additional Filename
Briefly speaking, by setting an additional compression program and filename, EAC can output two formats of rips at the same time.
Gap Detection and Cuesheets
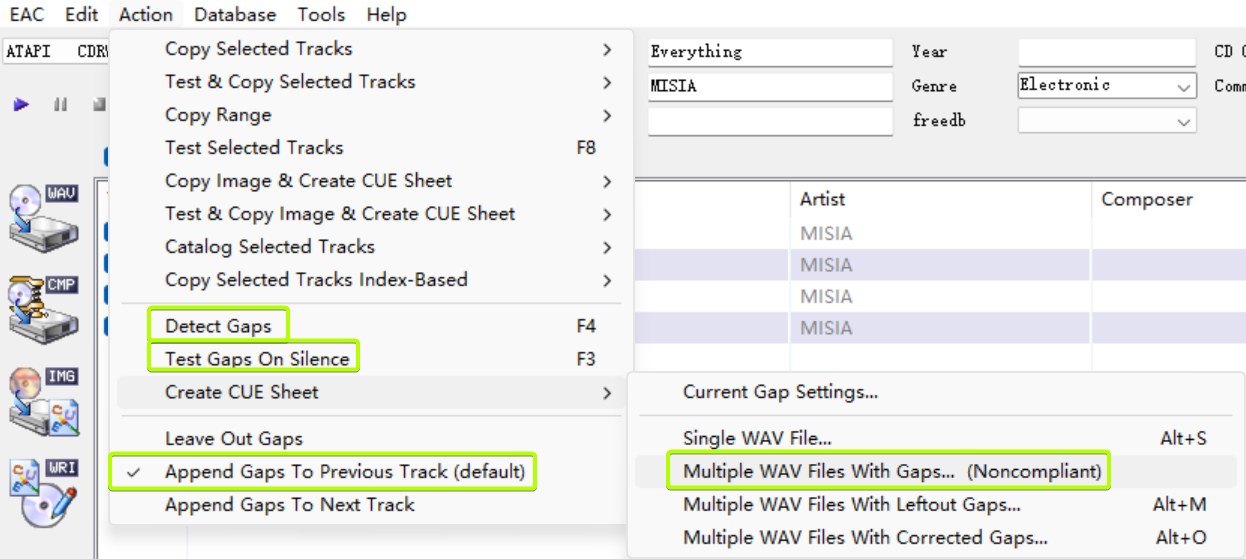
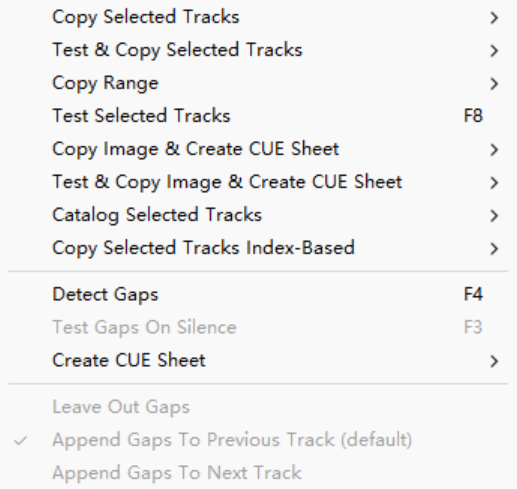
Check like the screenshot.
“Detect Gaps” first, and then “Test Gaps On Silence” (which is related to the ripping quality), and “Create CUE Sheet” → “Multiple WAV Files With Gaps… (Noncompliant)”. Put the CUE file in the rip folder.
The last three options would be gray if you didn’t detect gaps:
Ripping
Finally, the rip itself!
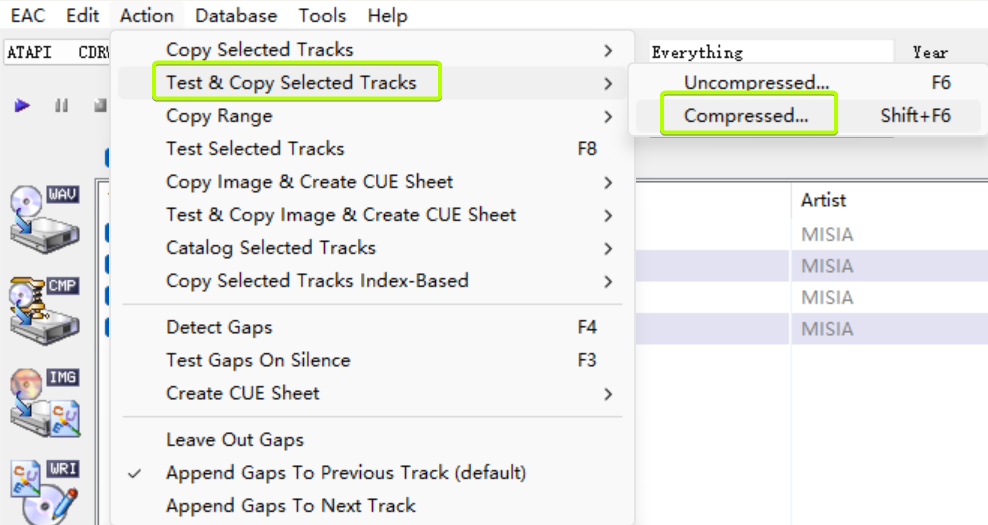
Make sure all the tracks are checked in the main window unless there are some you don’t want to rip. Check “Append Gaps To Previous Track (default)” and hit “Test & Copy Selected Tracks” → “Compressed…”.
Please avoid putting your rip in the path that contains your personal information. Because this path will be recorded in the LOG file which is EDITING FORBIDDEN.
Depending on your drive and whether or not the CD is scratched, this could take anywhere from ten minutes to hours. Be patient.
Sometimes, after ripping, AccurateRip would ask you to upload some information:
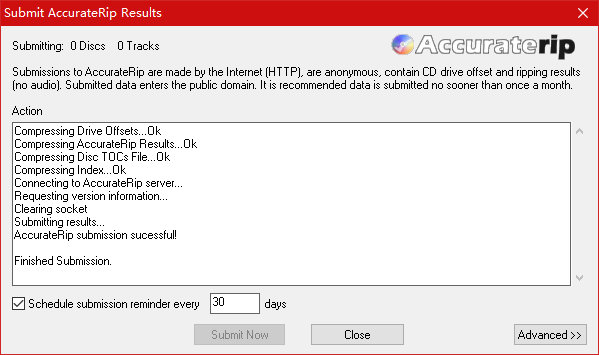
Hit “Submit Now” to help more rippers.
Now, you’ve finished your first configuration and ripping with EAC.
Post-Rip
Files
The CUE file you made is for burning, rather than a playlist (the M3U8 file is the playlist). Please notice the filename of CUE files. You may use the Artist - Album Title.cue format, like GARNiDELiA - Violet Cry.cue, which is identical to LOG and M3U8 files. You can also use the Noncompliant.cue as the filename.
Album Artwork (Cover)
The cover gives people an intuitive impression of the album and also reflects the core information, sometimes affecting the audience’s experience. So, finding a high-definition cover now is a wise choice, and the recommended ways to obtain it are:
- Amazon: Mostly are HD covers;
- Google: Search pictures by pictures;
- iTunes: The definition is very high, you even need to zoom it smaller. You may search and download easily from iTunes Artwork Finder or CoverBox;
- Netease Music;
- Album Art Downloader: A software with many cover sources.
After getting the cover file, you may cut it to a square, and name it “Cover” or “Folder”. If you want to embed the cover into an audio file (the advantage of doing so is that the mobile player can display the cover), its size should be less than 1024 KiB.
If the above methods cannot obtain satisfactory cover (such as finding blurry or redundant labels), it is also a good practice to scan and process them yourself. Please refer to the Scanning Guide.
Self-Checking
The entire tutorial is so cumbersome that you may make some small mistakes on your first attempt. How do you know if you have any missing steps?
Your LOG file will look just like the example if you set all options correctly.
An online tool called cambia LogTools can also help you, which is good-looking and powerful. What you should do is just drag and drop your LOG file to the browser, then see the score in “EVALUATIONS” is 100, which means your rip is great.
Maybe sometimes you can see the score is only 95, the reason why is “Incorrect read offset for drive”. It’s not your fault if you have configured the offset correctly by this tutorial. Unless there is a very rare problem happened.
FAQ
You may read the official FAQ.
About offset, here is my little research: Can We Get the Same Audio Data from Different CDs?
Knotty Problems
Got Nothing After Ripping Start
This may be caused by the presence of tab characters in the information-filling column used to generate file names. Please double-check whether the contents of columns such as “Artist”, “Album Title”, and “Track Title” contain redundant tab characters.
All Characters Looks Huge in EAC Configuration
This is because the font is missing, please install related font files.
The LOG File Shows That the Gap Length of the First Track Is not Identical to ToC
Please check if any video disc-ripping software such as AnyDVD is also running.
EAC Crashed
This may be caused by the activation of an additional external compression program. Please check whether “Compression Options…” → “Additional External Compression” is enabled. If enabled, please disable or specify the correct compression program path1.
References
- caaok@What.CD - Installing, configuring, and ripping with Exact Audio Copy (EAC);
- Exact Audio Copy FAQ.